



When using Pixsieset Studio Manager, you don’t necessarily need to use Pixsieste’s own website solution to be able to receive your leads into your Studio Manager Dashboard. You can add the contact form connected to Studio Manager in other places as well. Here below, I will show how to do that when you are using Showit for your website. You have both a step-by-step instruction and a video tutorial guiding you.

Why should you add a Pixieset contact form on your Showit website?
Using a CRM solution like Pixsieet’s Studio Manager is a brilliant way to keep things organized within your business, as it allows you to keep all information in one place around each of your clients. Even if Pixieset has its own website solution, you can use something other than that to have leads coming into your Studio Mnagared from your website.
You can easily add the contact form connected to your Studio Manager to your Showit website and collect leads from there.
Step-by-step instructions to add a Pixieset contact form to your Showit website
Below, you have the step-by-step instructions on how to add a Pixieset contact to your Showit website. At the bottom, you can also find the video tutorial guiding you through all the steps.
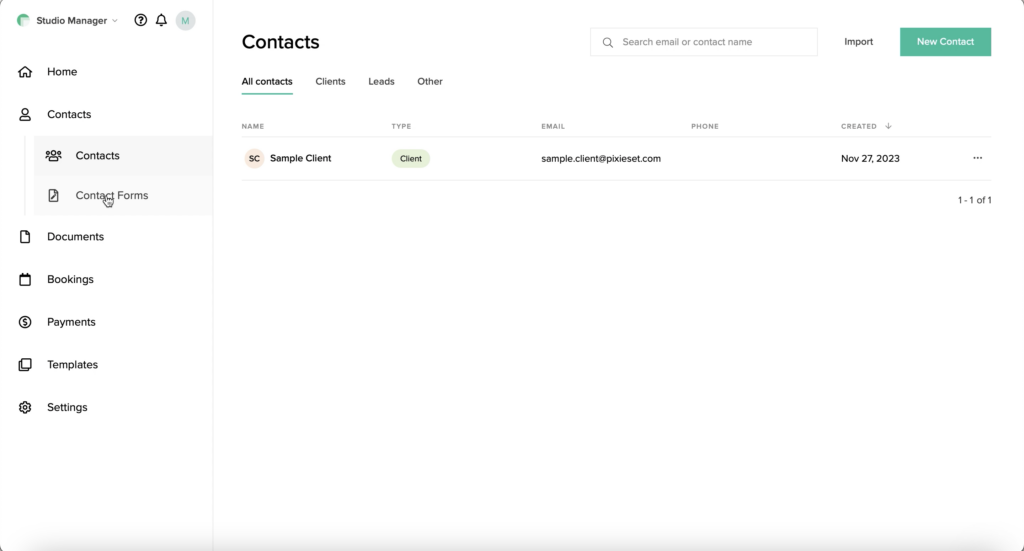
STEP 1
Go to your Pixieset Studio Manager, and under the “Contacts” menu select “Contact form”.
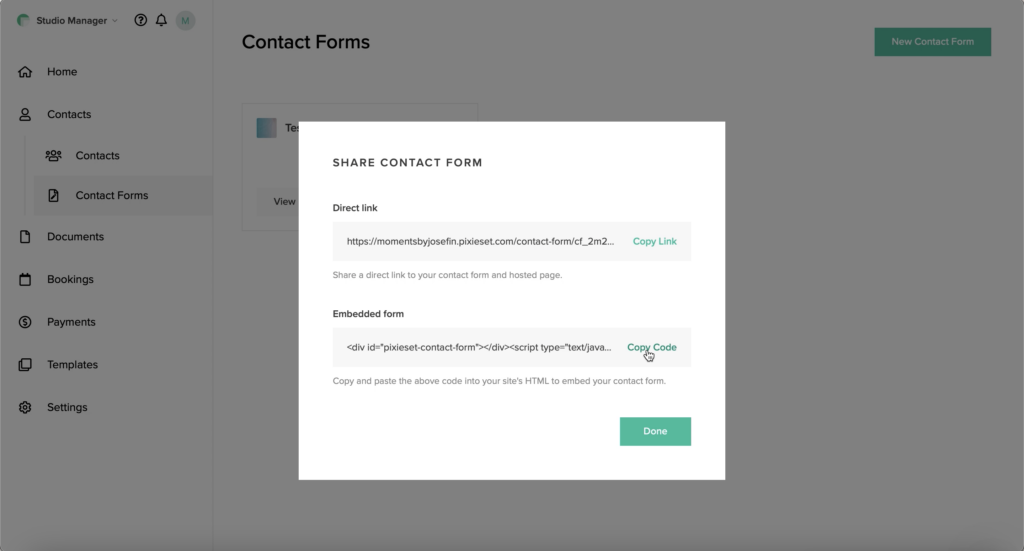
STEP 2
You can open any of your existing contact forms or create a new one. When you are done, click publish, and a new window will appear.
Copy the code that is visible under the “Embedded form”
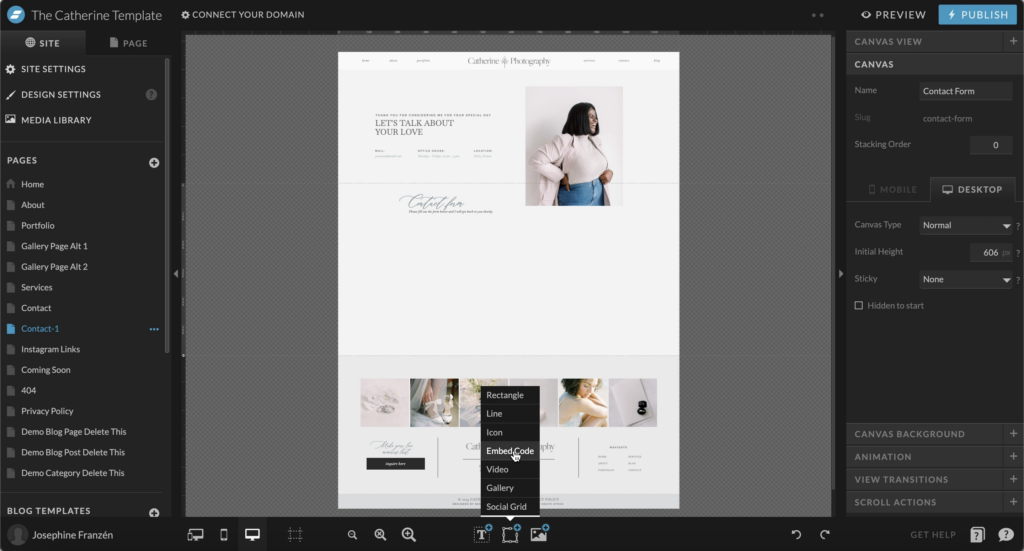
STEP 3
In the Showit editor, remove the existing contact form and add the placeholder for the “Embedded Code”. You do that by clicking on the middle menu at the bottom.
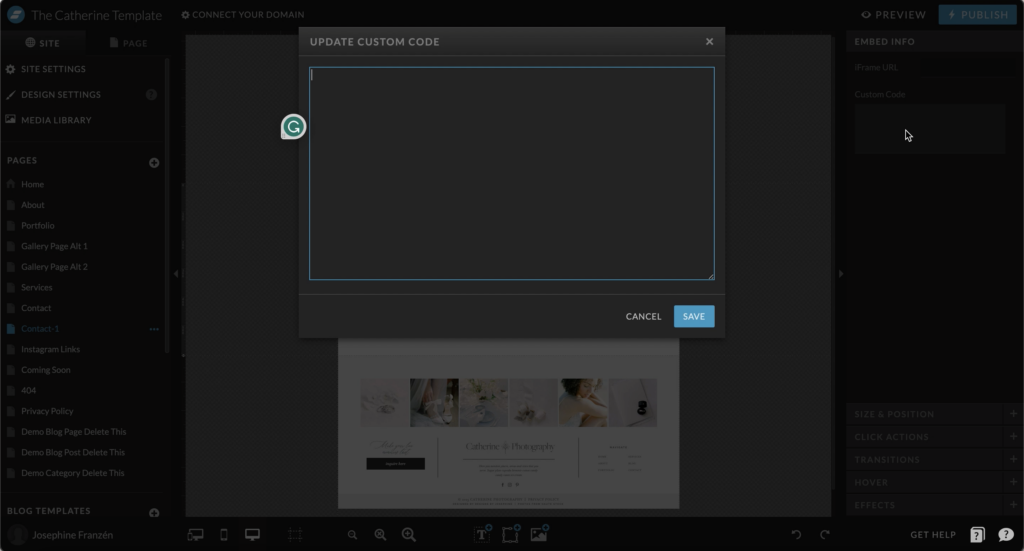
STEP 4
Click on the black square that appears. You will then have a menu showing on the right side menu named “Embed Info”. Click in the square for “Content Code” and paste the code we got from when we created the contact form at the Pixieset page.
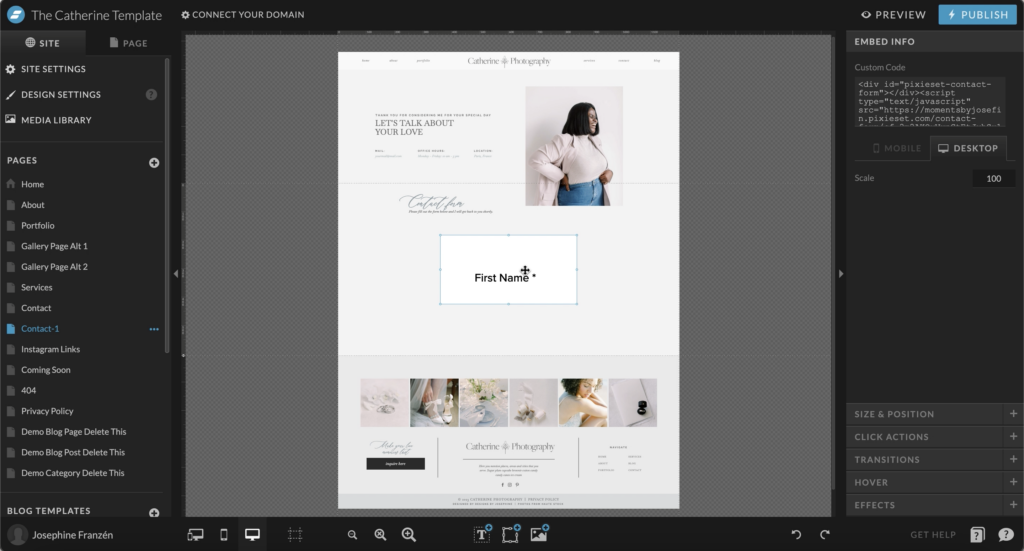
STEP 5
It will then look ugly like this.
To have a realistic view of how it will look, click on preview and follow the previous link.
STEP 6
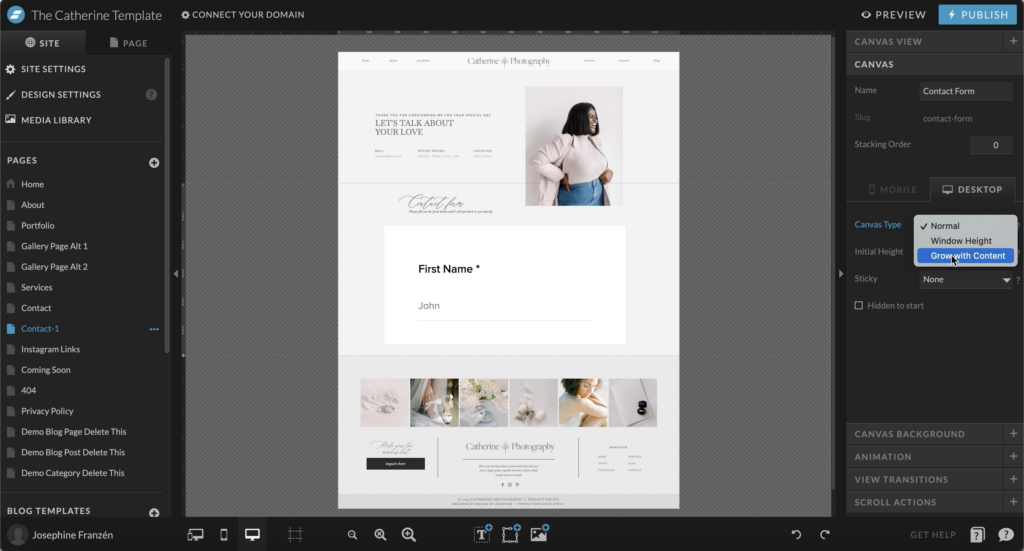
You might noticed that the contact form is cut, that the page is not long enough for your contact form.
Go back to the editor, select the canvas the contact form is added in and go in under “Canvas” at the menu at the right.
Under “Canvas Type”, select “Grow with Content”.
If you now click on the Preview link again, you will see that the length of the page is adjusted after the length of the contact form.
STEP 7
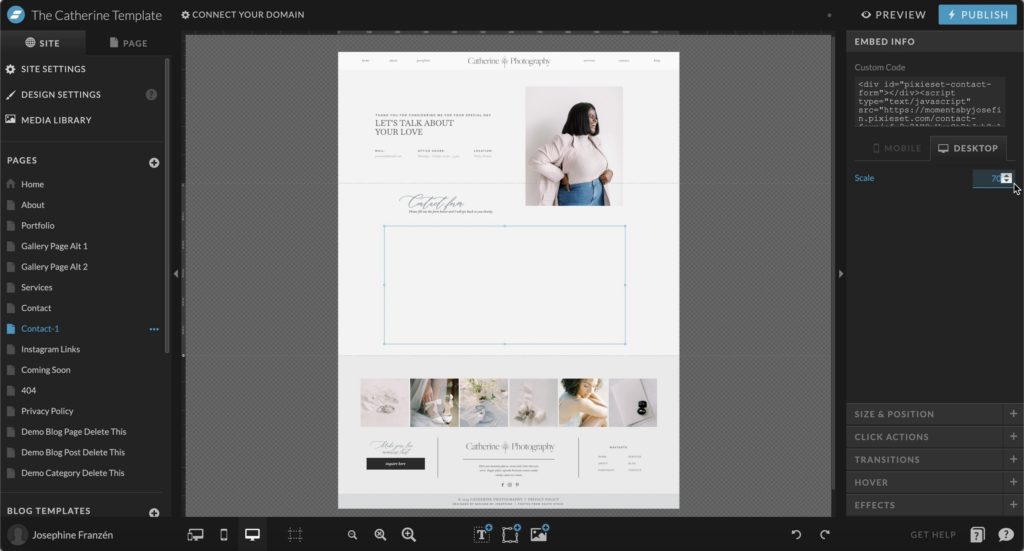
Depending on the design of your website, the contact form can look a bit too big. You can adjust that by going in under the “Embed Info” menu again and decreasing the scale.
If you are more of a visual learner, here is a video tutorial showing how to add a notification bar to your Showit website.


read more…
Leave a Reply
Other really good blog posts
You know that feeling when you’ve spent hours trying to figure out SEO, only to find your newborn photography website still buried on page 7 of Google? You’ve watched tutorial after tutorial but somehow you do not see inquiries via Google? That’s why I designed Ruth, the Showit template that makes SEO work for newborn […]
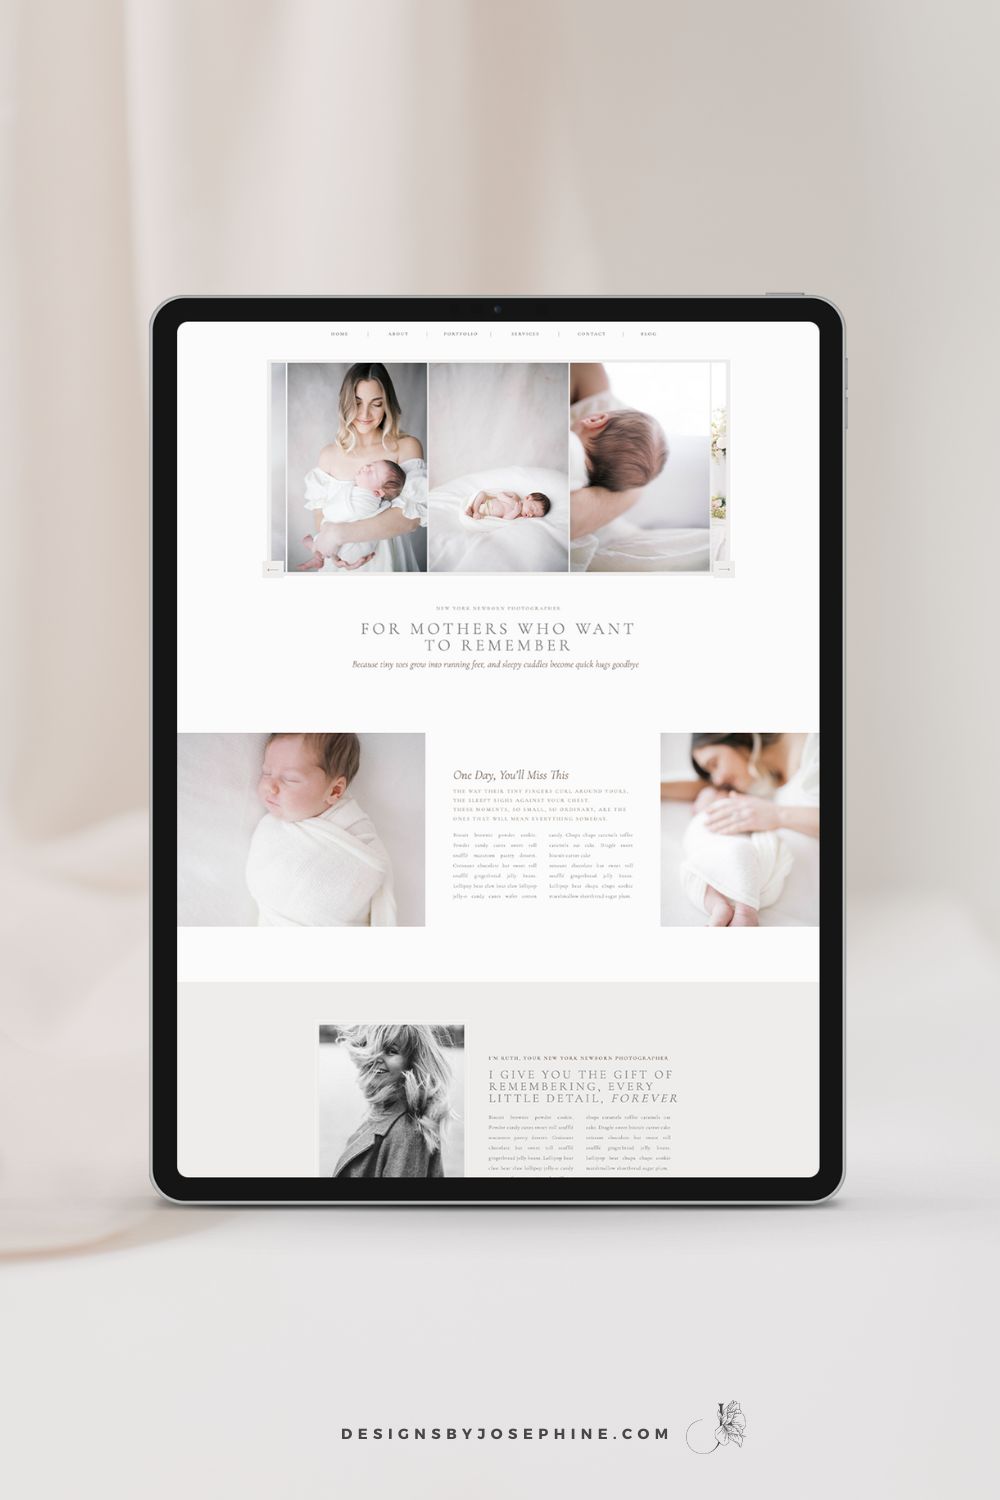
You create these beautiful, heartfelt moments for your clients. Your sessions are thoughtfully planned and your images are stunning. But does your website truly reflect the amazing experience you provide? Eleanor is the new Showit Template for Maternity, Newborn and Family Photographers who want their online presence to match the quality of their work. Create […]
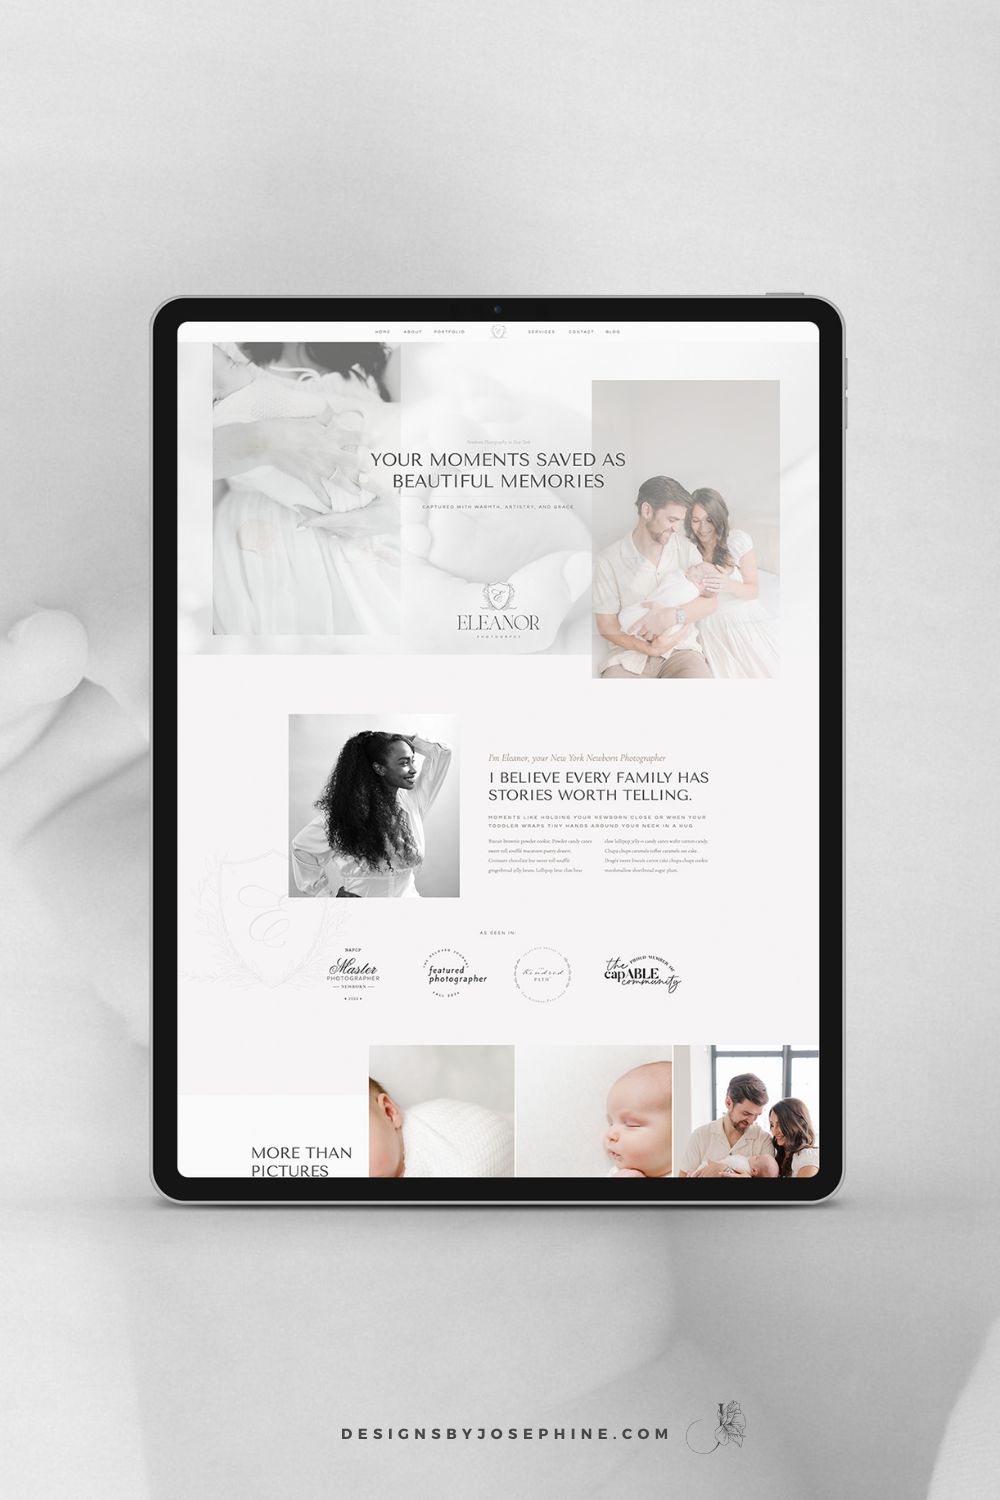
After months of pouring so much love into this project, I finally get to share what Candace and I created together. And oh my goodness, the story behind it all just makes me smile every time I think about it – a perfect blend of southern heritage and modern heirloom photography.Please have a closer look […]
We’ve all been there. After pouring your heart into a beautiful maternity session, you finally bring up wall art… only to hear those dreaded words: “I’ll just take the digitals.”Your heart sinks, knowing these precious memories might never make it off their hard drive.But here’s the truth. If your clients are consistently choosing digital-only packages, […]
As a motherhood photographer, you’ve likely experienced that frustrating moment when your marketing efforts feel as productive as a toddler lying on his belly playing with invisible dust on the floor during a photo session, ignoring you completely. Just like no matter how many Instagram posts you create or testimonials you add to your website, […]

Rachel Elisabeth Photography’s new brand and Showit website is live, and let me tell you—it was such a joy to see it all come together! From battling a stubborn font to crafting every little detail with love, this project was a true labor of passion and heart. Rachel’s new brand now beautifully reflects her warmth […]

If you should add your Instagram feed to the footer of your photography website is a question I often get, and honestly, there’s no one-size-fits-all answer. But that’s okay because, in this post, we’re going to talk through it together. By the end, I hope you’ll have a clearer idea of what’s right for your […]

What’s been leading through our brand and web design project is to create a sophisticated feeling that should send promises about the whole experience she offers her clients.Even if Lisa’s work speaks for itself, now, with her new brand and website, there is no doubt that she is the one to go to when looking for […]
When Tori told me about her vision of her new brand, I only needed to hear peonies and sweeping cursive handwritten fonts to know that this would be a dream to create.And I was right. Designing this Custom Branding for Wedding Photographer Tori Claire turned out so well with its romantic, soft, blush, and feminine […]
Kate’s new branding is inspired by her own journey through motherhood and her experience in the NICU. Her business is centered around preserving memories for mothers who have shared a similar experience.This branding and Showit website for Newborn Photographer Kate Voda is designed to create a warm and welcoming environment, like an open hug for […]
You know that feeling when you’ve spent hours trying to figure out SEO, only to find your newborn photography website still buried on page 7 of Google? You’ve watched tutorial after tutorial but somehow you do not see inquiries via Google? That’s why I designed Ruth, the Showit template that makes SEO work for newborn […]
You create these beautiful, heartfelt moments for your clients. Your sessions are thoughtfully planned and your images are stunning. But does your website truly reflect the amazing experience you provide? Eleanor is the new Showit Template for Maternity, Newborn and Family Photographers who want their online presence to match the quality of their work. Create […]
After months of pouring so much love into this project, I finally get to share what Candace and I created together. And oh my goodness, the story behind it all just makes me smile every time I think about it – a perfect blend of southern heritage and modern heirloom photography.Please have a closer look […]
We’ve all been there. After pouring your heart into a beautiful maternity session, you finally bring up wall art… only to hear those dreaded words: “I’ll just take the digitals.”Your heart sinks, knowing these precious memories might never make it off their hard drive.But here’s the truth. If your clients are consistently choosing digital-only packages, […]
As a motherhood photographer, you’ve likely experienced that frustrating moment when your marketing efforts feel as productive as a toddler lying on his belly playing with invisible dust on the floor during a photo session, ignoring you completely. Just like no matter how many Instagram posts you create or testimonials you add to your website, […]
Rachel Elisabeth Photography’s new brand and Showit website is live, and let me tell you—it was such a joy to see it all come together! From battling a stubborn font to crafting every little detail with love, this project was a true labor of passion and heart. Rachel’s new brand now beautifully reflects her warmth […]
If you should add your Instagram feed to the footer of your photography website is a question I often get, and honestly, there’s no one-size-fits-all answer. But that’s okay because, in this post, we’re going to talk through it together. By the end, I hope you’ll have a clearer idea of what’s right for your […]
What’s been leading through our brand and web design project is to create a sophisticated feeling that should send promises about the whole experience she offers her clients.Even if Lisa’s work speaks for itself, now, with her new brand and website, there is no doubt that she is the one to go to when looking for […]
When Tori told me about her vision of her new brand, I only needed to hear peonies and sweeping cursive handwritten fonts to know that this would be a dream to create.And I was right. Designing this Custom Branding for Wedding Photographer Tori Claire turned out so well with its romantic, soft, blush, and feminine […]
Kate’s new branding is inspired by her own journey through motherhood and her experience in the NICU. Her business is centered around preserving memories for mothers who have shared a similar experience.This branding and Showit website for Newborn Photographer Kate Voda is designed to create a warm and welcoming environment, like an open hug for […]